
BRIO 101
Want to use Brio, but aren't sure how it works? This guide will help you get started!
Introduction
Brio is a GPose tool that was originally developed by AsgardXIV and is currently maintained by Minmoose. I'm truly thankful to both of them for the incredible work they've done for the GPosing community!
This guide operates on the following assumptions:
You understand FFXIV's vanilla GPosing interface
You already have the Brio plugin installed
If you still need Brio, you can find installation instructions on the Brio Github page.
One more note: I am not a developer. If you're looking for information on upcoming features or need help resolving an issue, please refer to either of the following:
Table of Contents
Setting the Scene
Posing and More
Background photo by Joshua Bayliss on Unsplash
Libraries
Within Brio, libraries tell the application where to pull poses and characters from. A pose is any .pose file that you may have downloaded or created. Characters are .chara or .mcdf files that contain a character's appearance data.To set up libraries, refer to the following steps:
Click on the Library button at the top of the window, then select either Characters or Poses.
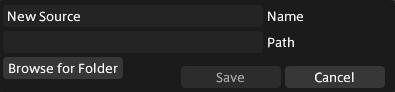
At the bottom of the window, click Add new source. You may see that, by default, Brio is looking for certain file paths. If you create these, Brio will automatically detect them. Otherwise, continue to the next step to add your own custom folder.
Click the plus icon in the lower right. Browse for a folder, then type in a name and save your changes.


You can find poses on XMA and Glamour Dresser or make your own!
Settings
Clicking on the gear icon in the upper right corner of the window (next to Library) will open the application settings.In this window, you can make various adjustments to make Brio easier to use for yourself. Here are some of the options you can configure:
Enable or disable integration with Penumbra, Glamourer, and Customize+
Change the overlay colors that appear when posing
Enable, disable, or set keyboard shortcuts
Determine when you want Brio to open (such as on entering GPose or only manually)
Environment
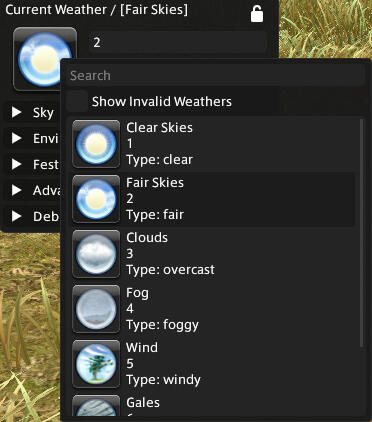
The Environment tab controls both the weather and time of day in your GPose. When changing the weather, Brio will automatically display all the naturally-occurring weathers for that area. You can check the box for Show Invalid Weathers to view all of them, but be warned that not all weathers work for all areas.
If you want to edit specific details of the environment, the Sky and Environment panels contain a variety of settings for changing aspects of the sky, weather, and more.
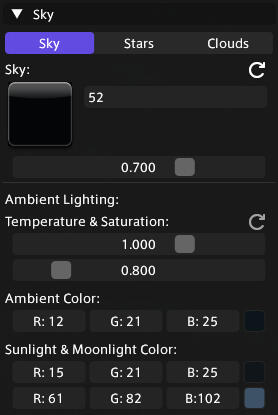
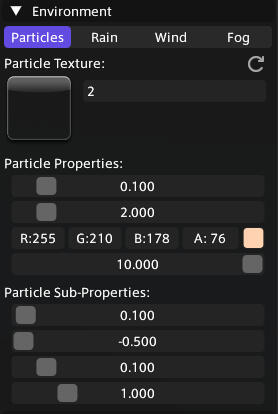
The best way to figure out the settings that suit your GPose is to experiment! You can always revert the sky and environment back to their default settings by clicking on their respective Reset arrows.
Cycling through different Cloud Side Textures in the Sky panel
Lights
An additional feature of the Environment tab is the ability to add lights to your GPose by clicking on the plus icon next to the heading.Lights come in three types: Spot Light, Point Light, and Flat Light.
Spot Light
Point Light
Flat Light
You can control the color, position, and intensity of each light you add by selecting it in the Brio window. This includes any lights you add through the vanilla GPose interface.
Cameras
Upon opening GPose, you'll automatically start out with the Default Camera. Each camera in Brio has its own rotation, zoom, and FoV settings that you can adjust. You can also choose an actor for a camera to focus on.To move the Default Camera, click and drag within one of the Offset, Pan, or Angle fields. You can reset a camera back to its initial position by clicking on each field's respective Reset arrow.
Positioning the Default Camera
If you want to use multiple cameras for your GPose, you can add them by clicking on the plus icon next to the Cameras heading. Cameras come in two types: Brio Cam and Free-Cam. A Brio Cam functions essentially the same as the Default Camera.A Free-Cam is not constrained to an actor and, like the name implies, can freely move around without limitations.Clicking on the Enable Movement button will allow you to "fly" around the scene with the Free-Cam. Enabling Lateral Movement will make it so the Free-Cam can only move in straight lines.Tip: If you're struggling to figure out how to move the camera, try checking your keyboard shortcuts in Settings.
Moving around with a Free-Cam
You can view all of your cameras in a list by clicking on the Cameras heading. Clicking on Destroy All will remove all of your current cameras except for the Default Camera.
Actors
Actors are the characters in your GPose. You'll automatically start with one—the character you're currently playing as! You can add more actors to your scene by clicking the plus icon next to the Actors heading.When adding new actors, you can choose between the following:
| Name | Definition |
|---|---|
| Actor | A character model whose appearance you can alter and/or load an NPC appearance onto. |
| Actor with Slot | The same as above, but the character spawns with a Companion slot, which will appear towards the bottom of the Brio panel. Minions, mounts, and ornaments can be loaded into this slot. |
| Prop | An object that you can move around the scene after it's spawned. Click on the icon under the Change Prop section to access the full list of props you can choose from. |
You can click on the Actors heading to view all of your actors in a convenient list. Be warned that if you choose the Destroy All option, Brio will remove all of your current actors, INCLUDING the initial character you started with.
Appearance
The appearance panel controls the way each actor in your GPose looks. From here, you can customize actors, load NPC appearances, and load MCDFs. You can also apply a Penumbra collection and/or a Glamourer design to an actor.To get started, select the actor whose appearance you want to edit by clicking on their name in the upper panel. You then have several options:
To turn the actor into an NPC, click Load NPC Appearance and double-click the character you want
To load a saved appearance, click Import Character and then navigate to the file you want to load
To change the character's equipment or customization, click Advanced

The Advanced Appearance menu. Note that you can load NPC appearances, apply collections/designs, and redraw an actor from here as well
Once you're happy with an actor's appearance, you can save it for future use by clicking Save Character File. Make sure you're saving in the correct folder so you can find the file later!Tip: You may sometimes find that, after loading an appearance, the actor doesn't change right away. To solve this, make sure you have them selected, and then click the Redraw button.

MCDFs
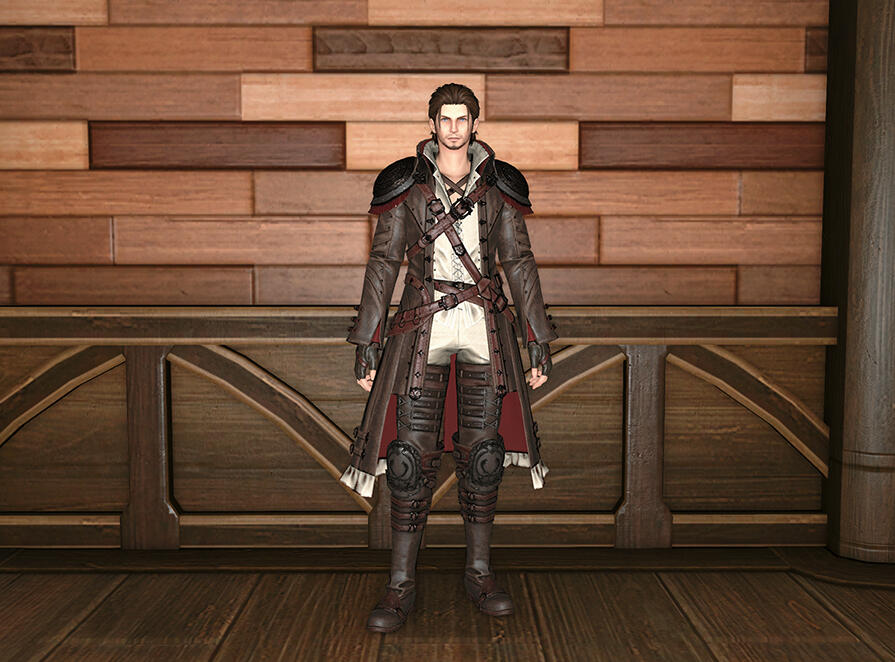
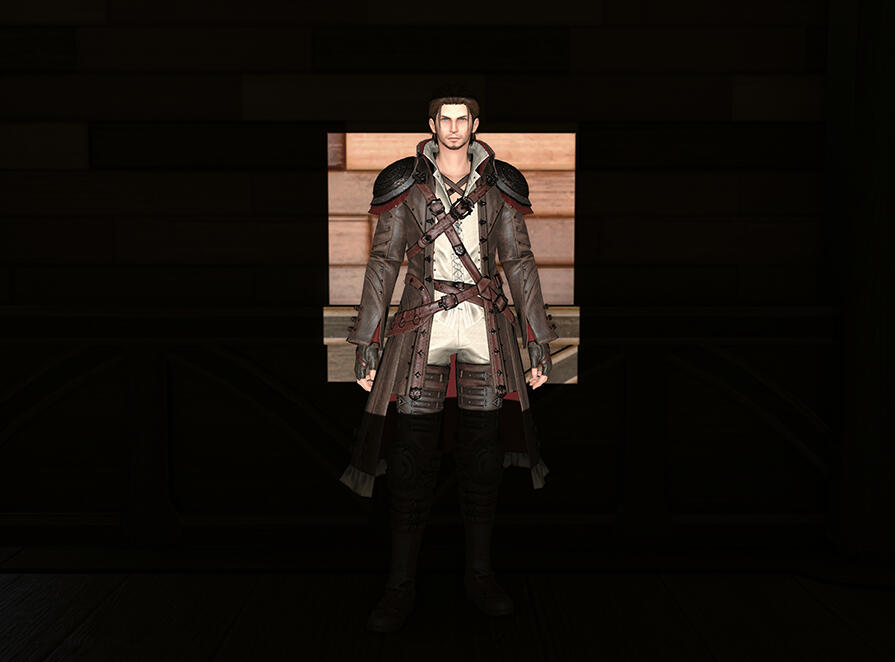
An MCDF is a type of character appearance file that, unlike a .chara file, contains all of the mods currently active on that character.For instance, say that you have a certain outfit mod that you use for your character. If you were to export an MCDF and send the file to a friend, they could then load it into Brio and see your character wearing that outfit despite not having the mod themselves.Note that these files only work within GPose. Outside of it, your character will still appear unmodded.
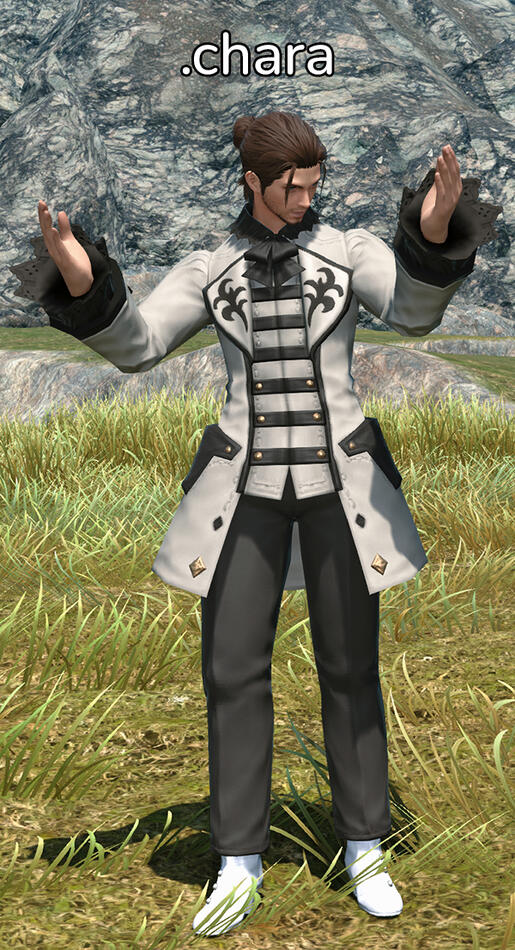
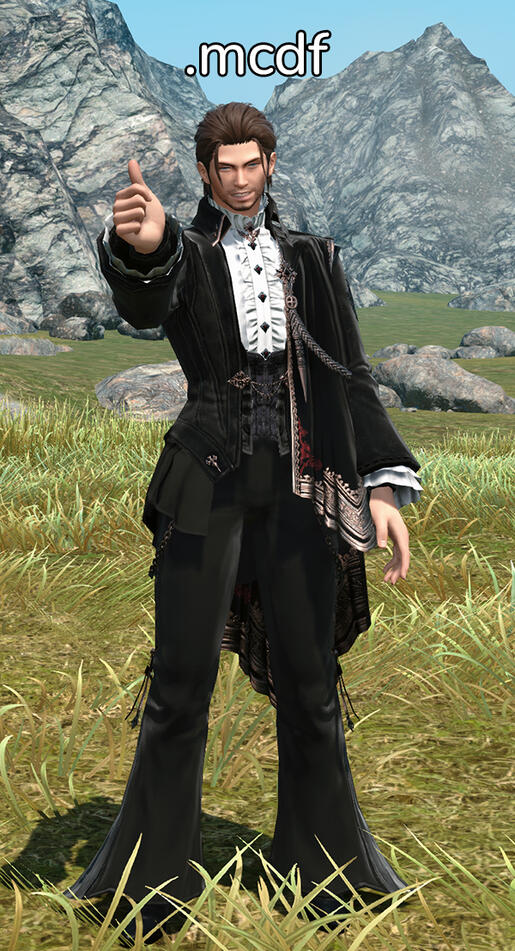
The outfit shown on the right can be found here
Basic Posing
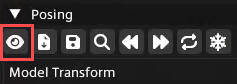
Before you begin posing an actor, it's best to freeze their motion. Otherwise, the actor will continue to "breathe" while you're posing, which can lead to unwanted clipping.To reposition or rotate an actor, click and drag left or right on their respective fields. Alternatively, you can double-click on a field and manually type in a value. You can also control scale this way, which can be useful if you need an actor to be a little larger or smaller.
Positioning and rotating an actor
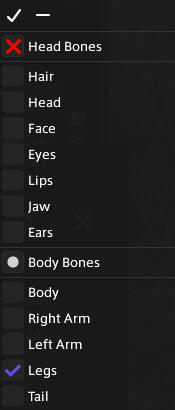
To load a .pose file, select your actor and click Import Pose under the Posing panel.Brio offers several options when loading a pose—you can import just the body, just the expression, or you can choose which specific bones to import. For instance, if you like the way the legs are positioned in a certain pose, but don't care for the rest, your import settings might look like this:
If you ignore the options and just click Import, Brio will import the pose's body and expression together by default.To save a pose, click the Save Pose button. Make sure you're saving in the correct folder so you can find your file again later!
The following is a quick overview of the buttons you'll find in the Posing panel:
| Name | Definition |
|---|---|
| Overlay | Opens or closes the Posing Overlay |
| Import Pose | Applies a saved .pose file to an actor |
| Save Pose | Saves the current pose for the selected actor |
| Bone Search | Displays a list of posable bones that you can select from |
| Undo | Undoes an action |
| Redo | Redoes an action |
| Mirror Pose | Flips the current pose |
| Freeze Character | Stops all motion for the selected actor |
| Reset Pose | Sets the actor back to their initial pose before any edits made with Brio |
Advanced Posing
Click the arrow next to the Posing header in order to open the Advanced Posing window. From here, you can select specific bones and position them as needed.Out of position, rotation, and scale, you will likely be using rotation the most when posing. Regardless, the process for editing any of these is the same—you can click and drag left or right in a property's field or use the gizmo.
Rotating the Left Arm bone
When it comes to editing position and scale, the best way to figure out what you need for your GPose is to experiment! In my experience, small edits to positions can help make an expression look more realistic, and scale is useful for controlling the size of weapons and props. Remember that you can always click the Undo button if you're unhappy with the way something looks!
Linking and Mirroring
One way Brio makes posing easier is giving you the option to Link or Mirror two separate bones. To do this, first select one bone, and then click on the Link icon.
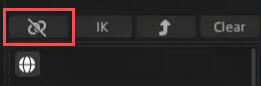
Clicking on the icon once will let you link to a second bone, and twice will mirror them instead. Three times will switch the bone's status back to "unlinked." You will see the icon change to reflect this.After you've clicked the icon for one bone, select the second one and click the Link icon for it as well. This will connect the two until you unlink them.
Linking two bones will cause them to move or change in the same exact way. For instance, if you were to link the left and right arms of an actor, moving one arm up would cause the other to do the same.
Linking the Left Eye and Right Eye
Meanwhile, mirroring two bones will cause the second to do the opposite as the first. For example, as seen in the video below, mirroring the actor's left and right arms causes one to swing backwards when the other swings forwards.
Mirroring the Left Arm and Right Arm
The Posing Overlay
Clicking on the Overlay icon in the Posing panel will open the Posing Overlay. This allows you to select and adjust a bone by clicking directly on its node and interacting with the gizmo.
To minimize clutter, you can click on the Bone Filter in the Overlay panel and select various checkboxes to show or hide them in the overlay.
Using the Posing Overlay
The Select Parent button in the panel will select the bone that is one up in the "hierarchy" from the one you currently have selected. For example, if you have the Right Forearm selected, clicking Select Parent will select the Right Arm.
Inverse Kinematics
Enabling Inverse Kinematics will make it so that moving one bone also moves several that are connected to it.To use this feature, refer to the following steps:
With an actor selected, open the Posing Overlay.
Select the bone you want to move.
In the Overlay panel, click the Inverse Kinematics icon.
Select the Enabled checkbox.
You have the option of adjusting the depth and iterations that Inverse Kinematics will use. There's no hard and fast rule for which numbers work best—you can leave them as they are, or experiment to find what works best for you!
Moving the position of the Right Hand with Inverse Kinematics enabled
After you're done positioning a bone, clicking the Set IK Changes button will lock in all of your edits and turn Inverse Kinematics off.
Dynamic Face Control
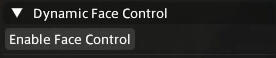
Brio's Dynamic Face Control functions similarly to vanilla GPose's Face Camera and Track Camera features. To begin using it, select an actor and then click Enable Face Control.
Once enabled, there are three options you can choose from. You can choose to have your selected actor track:
The camera: As you rotate the camera around, the actor will follow its movements.
A set position: The actor will face the camera's current position and then stay there. Moving the camera and then clicking the Set to camera value button will make them face the camera's new position.
Another actor: The selected actor will track the movements of a secondary actor.
Brio also gives you the option of having an actor track movement with their eyes, body, and/or head. You can have any combination of these active at the same time. Additionally, keep in mind that selecting "body" will only make the actor rotate their upper body.
Animation
With the Animation Control panel, you can have an actor perform both emotes and various non-emote actions from the game.
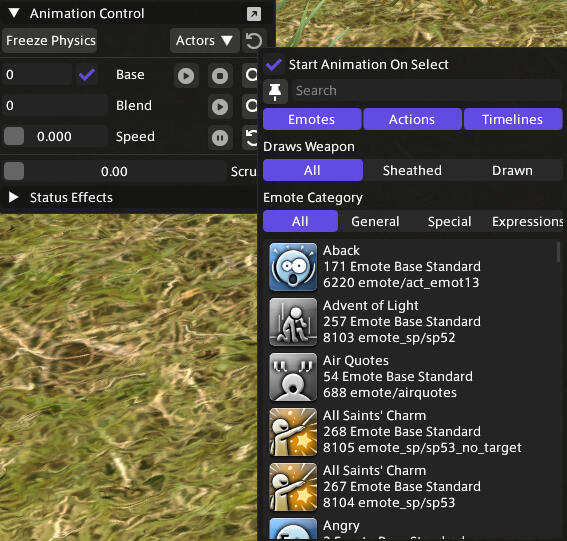
After you've found the animation you want, you can play it by either double-clicking it in the list or by selecting it and then clicking the Play button. Clicking and dragging inside the Speed field will make the animation play faster or slower.Outside of emotes, not all actions will work for all races/genders, and some will only play for specific monsters/enemy NPCs. To get a better idea of some of the animations an actor can use, refer to the community-maintained animations spreadsheet.
Blending Animations
Certain animations can be blended to form unique combinations. The Base animation will always animate an actor's lower body, and the Blend animation will play on their upper body. To get started, follow these steps:
With an actor selected, open the Animation Control panel and click the search icon to find a Base animation.
Select the animation you want so that a number appears in the Base field. Alternatively, you can double-click it to play it immediately.
Click the search icon next to the Blend field. Animations that can be combined with a Base will have the word "blend" in their name (see below).
Once you've selected a Blend animation, click the Play button for your Base if you haven't already, and then play the Blend animation.

It may take a few tries to get your two animations timed exactly right. Remember that you can always click and drag in the Scrub field or adjust an animation's Speed to make the process easier!
Blending the Vexed emote with the Box Step emote
Advanced Animation
To open the Advanced Animation Control window, click on the arrow to the right of the Animation Control header. At the top of this window, similar to vanilla GPose, you can select from various lip movements to make it appear like an actor is talking.The Slots section in the window controls the speed of the listed animation slots. Most animations don't use all of these, typically only using the Facial slot.
Cutscene Control
The Cutscene Control (also sometimes called XAT Camera Control) section allows you to load a camera path and have it play. A camera path is an .xcp file that, when played, has the GPose camera move in a certain way, such as zooming out or imitating a dolly shot. This is a useful feature if you're creating a video or animated gif and want your shot to look more cinematic.Just like with a regular camera in Brio, you can control the offset of the Cutscene Control camera. Additionally, if you want a pre-selected animation to begin playing at the same time as the camera, you can check the box for Start All Actors Animations On Play. Setting delays can help get your scene looking just right!
Playing a camera path that tilts upwards
Camera paths can be created in Blender, or you can download them from other people. One of my favorite packs can be found here: Cutscene Control Camera Pack #1